Free Delivery  ·  COD Available  ·  15-Day Returns
Pricio
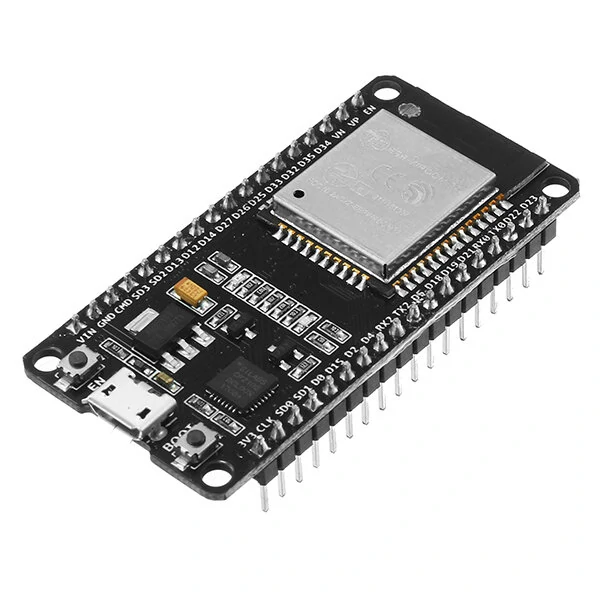
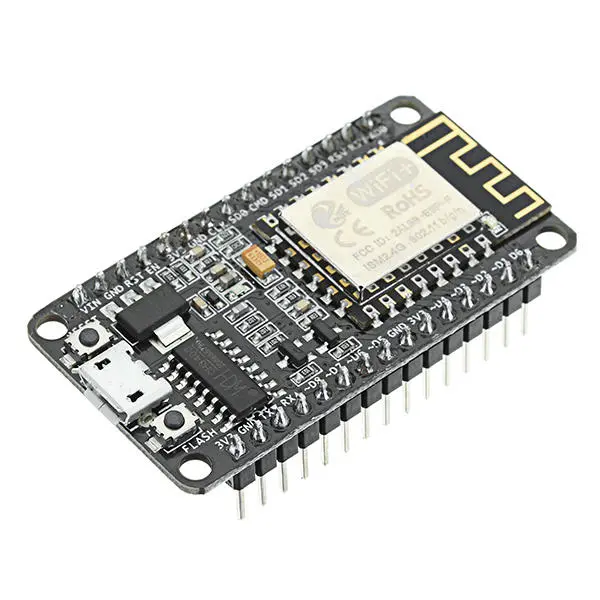
Geekcreit® NodeMcu Lua ESP8266 ESP-12F WIFI Development Board — image 1
Hover to zoom

1 / 10 · Click to enlarge

Geekcreit

Geekcreit® NodeMcu Lua ESP8266 ESP-12F WIFI Development Board

5.02,058 ratings
18.3k+ bought in past month
AI Summary
Smart Module for everyday users

The Geekcreit® NodeMcu Lua ESP8266 ESP-12F WIFI Development Board by Geekcreit is a mid-range smart module designed for everyday users. Customers praise its easy to set up and use and excellent build quality. 100% of buyers rate it 4★ or above.

easy to set up and useexcellent build qualityfast and responsivecompact and portable
₹4,393
Free Shipping💵 COD Available

Available Offers

Free Delivery on this order. No minimum order value.

15-Day Easy Returns — hassle-free return & full refund.

Secure Payment — 100% safe checkout with UPI, Cards & Net Banking.

Price: ₹4,393

Total: ₹4,393
Buying tip: A quality investment for dependable performance and premium build quality.
Estimated delivery: 21 Aug4 Sept
Free Shipping
Pan India delivery
15-Day Returns
Hassle-free policy
Secure Payment
Razorpay protected
Quality Assured
Vetted products only

Available Offers

💳

5% Cashback

Pay with UPI & get 5% cashback (up to ₹50) via Razorpay

🏦

No-Cost EMI

Available on select bank cards at checkout. 0% interest for 3 months.

📦

Free Shipping

Free delivery on all orders. No minimum order value.

💵

Cash on Delivery

COD available on orders up to ₹5,000 across India.

Ideal For

Electronics projectsArduino / Raspberry Pi buildsPrototyping
Share:
SKU: bg-985891Category: Smart Module

About This Product

The Geekcreit® NodeMcu Lua ESP8266 ESP-12F WIFI Development Board by Geekcreit is a mid-range smart module designed for everyday users. Customers highlight its easy to set up and use and excellent build quality.

Customer Verdict

100% of buyers rated this product 4 stars or above. The most appreciated qualities are: easy to set up and use, excellent build quality, fast and responsive, compact and portable.

Why Buy from Pricio?

Pricio sources this product directly, cutting out multiple middlemen. Every order includes free shipping, a 15-day return policy, and secure payment via Razorpay.

CH340 chip-driven official description: 
WINDOWS driver USB to serial CH341 / CH340 installation package Support WINDOWS 98 / ME / 2000 / XP / Server 2003 / VISTA / Server 2008 / Win7 / Win8 / Win8.1 32 Bit / 64 and MAC0 Through digital signature authentication In the computer end of the USB device emulation as a standard serial devices Serial COM It contains the serial number and identification CH34X monitoring CH34X equipment swap library. Driver: http://en.doit.am/CH341SER.zip
Feature:

Wireless 802.11 b / g / n standard
Support STA / AP / STA + AP three operating modes
Built-in TCP / IP protocol stack to support multiple TCP Client connections (5 MAX)
D0 ~ D8, SD1 ~ SD3: used as GPIO, PWM, IIC, etc., port driver capability 15mA
AD0: 1 channel ADC
Power input: 4.5V ~ 9V (10VMAX), USB-powered
Current: continuous transmission: ≈70mA (200mA MAX), Standby: <200uA
Transfer rate: 110-460800bps
Support UART / GPIO data communication interface
Remote firmware upgrade (OTA)
Support Smart Link Smart Networking
Working temperature: -40 ℃ ~ + 125 ℃
Drive Type: Dual high-power H-bridge driver
Package included:
1 x NodeMcu Lua ESP-12F WIFI Development Board

,,,,,,,
Product Safety Information

Setup Guide

1
Identify the pins
Locate VCC (power), GND (ground), and data pins (SDA/SCL for I2C, MOSI/MISO for SPI, or TX/RX for UART). Refer to the pinout diagram on the product page.
2
Wire to your microcontroller
Connect VCC to 3.3V or 5V (check the module spec), GND to GND, and data pins to the appropriate GPIO pins on your Arduino or Raspberry Pi.
3
Install libraries
In Arduino IDE, go to Sketch → Include Library → Manage Libraries and search for the sensor library. Install the recommended version.
4
Upload example sketch
Open File → Examples → [library name] → Basic Example. Upload to your board and open Serial Monitor to view output.
5
Calibrate if needed
Some sensors (temperature, humidity, distance) may need a short warm-up period or calibration. Run the calibration sketch if provided.