
1 / 8 · Click to enlarge
TSCINBUNY ESP32 Camera Starter Kit for Arduino Programming DIY Electronic Automation Project Set ESP32 Wrover Professional Complete Kits
5.02 ratingsThe TSCINBUNY ESP32 Camera Starter Kit for Arduino Programming DIY Electronic Automation Project Set ESP32 Wrover Professional Complete Kits is a mid-range product designed for professionals.
Available Offers
Free Delivery on this order. No minimum order value.
15-Day Easy Returns — hassle-free return & full refund.
Secure Payment — 100% safe checkout with UPI, Cards & Net Banking.
14% Off — you save ₹690 on this product!
Available Offers
5% Cashback
Pay with UPI & get 5% cashback (up to ₹50) via Razorpay
No-Cost EMI
Available on select bank cards at checkout. 0% interest for 3 months.
Free Shipping
Free delivery on all orders. No minimum order value.
Cash on Delivery
COD available on orders up to ₹5,000 across India.
Ideal For
About This Product
The TSCINBUNY ESP32 Camera Starter Kit for Arduino Programming DIY Electronic Automation Project Set ESP32 Wrover Professional Complete Kits is a mid-range designed for professionals. It delivers reliable performance at an accessible price.
Why Buy from Pricio?
Pricio sources this product directly, cutting out multiple middlemen. Every order includes free shipping, a 15-day return policy, and secure payment via Razorpay.
Feature:
This ESP32-WROVER Starter Kit - your gateway to the exciting world of Internet of Things (IoT) development! Featuring cutting-edge technology, the kit is designed to help both beginners and experienced developers create innovative projects.
Unleash the full potential of the ESP32-WROVER module, a powerful microcontroller with integrated Wi-Fi and Bluetooth. This starter kit provides you with all the essential components and tools you need to easily start your IoT journey.
Join a thriving community of developers and enthusiasts, sharing knowledge and experience to help you make the most out of your projects. The ESP32-WROVER Starter Kit is not just a product, it's an invitation to be part of an exciting and dynamic system.
Whether you're an experienced programmer or just starting out, our ESP32-Wrover Starter Kit is the perfect way to learn more about electronics and build your own smart systems. With its user-friendly interface and intuitive design, anyone can get started with this versatile and easy-to-use kit.
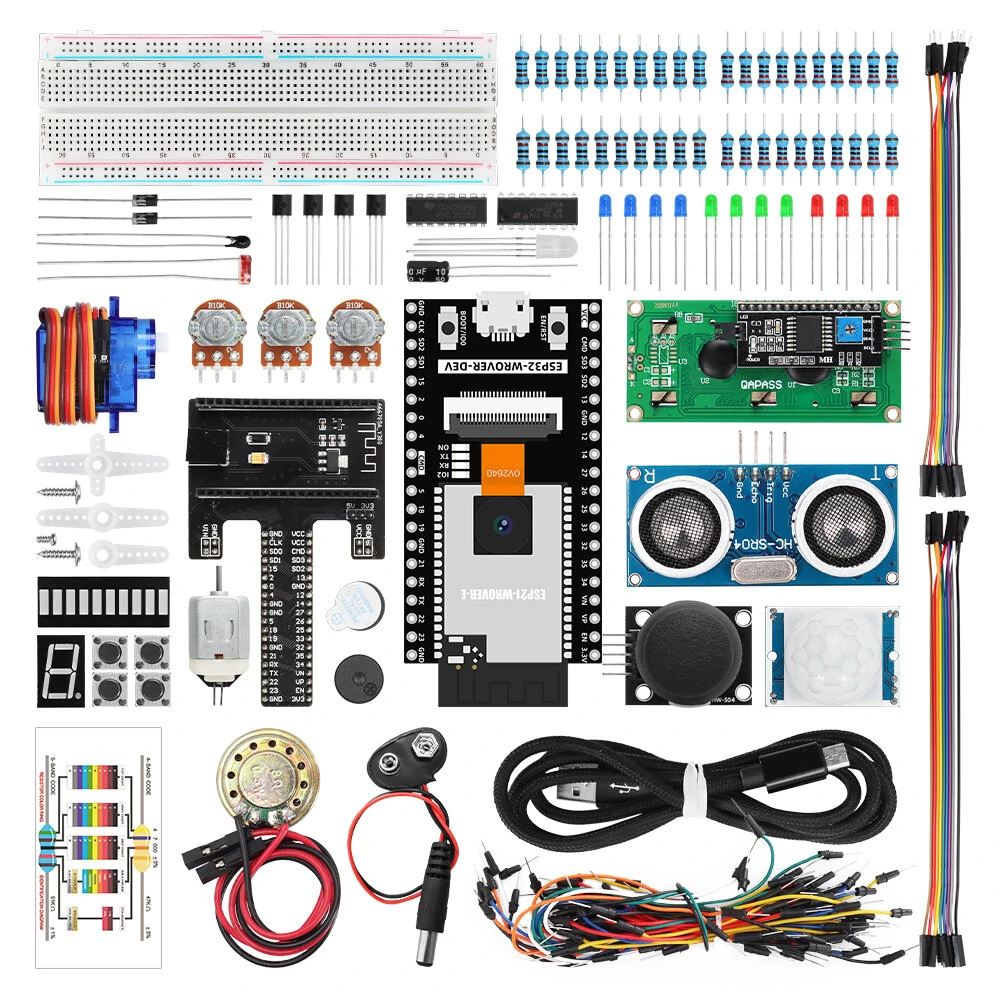
Package includes:
1 x ESP32-WROVER Motherboard
1 x Expansion Board
1 x 5V motor
1 x Ultrasonic Module
1 x 1602 with I2C LCD
1 x Rocker Module
3 x 10K Potentiometer
1 x SG90 Servo
1 x HC-SR501 Module
1 x 8ohm 0.5W small speaker
1 x 9V battery buckle
1 x Active buzzer
1 x Passive buzzer
1 x 10UF50V Electrolytic Capacitor
2 x IN4001 diode
1 x 10K Thermistor
1 x LDR5516 Photoresistor
2 x NPN Triode
2 x PNP Triode
1 x IC L293D
1 x IC 74HC595
4 x Light Touch Switch
3*4 x 3mm LED red/green /blue
1 x Misty RGB
1 x 1K metal
10 x film resistor
10 x 10Kmetal film resistor
20 x 220Ωmetal film resistor
1 x 0.56" 1-digit digital tube
1 x 10-segment light bar digital tube
1 x 830 Bread board
1 x 10-pin 20cm F-F duplex cable
1 x 10-pin 20cm M-F duplex cable
1 x 65 breadboard jumpers
1 x Micro USB cable
1 x Resistance Identification Card


