
Free Delivery  ·  COD Available  ·  15-Day Returns
Pricio
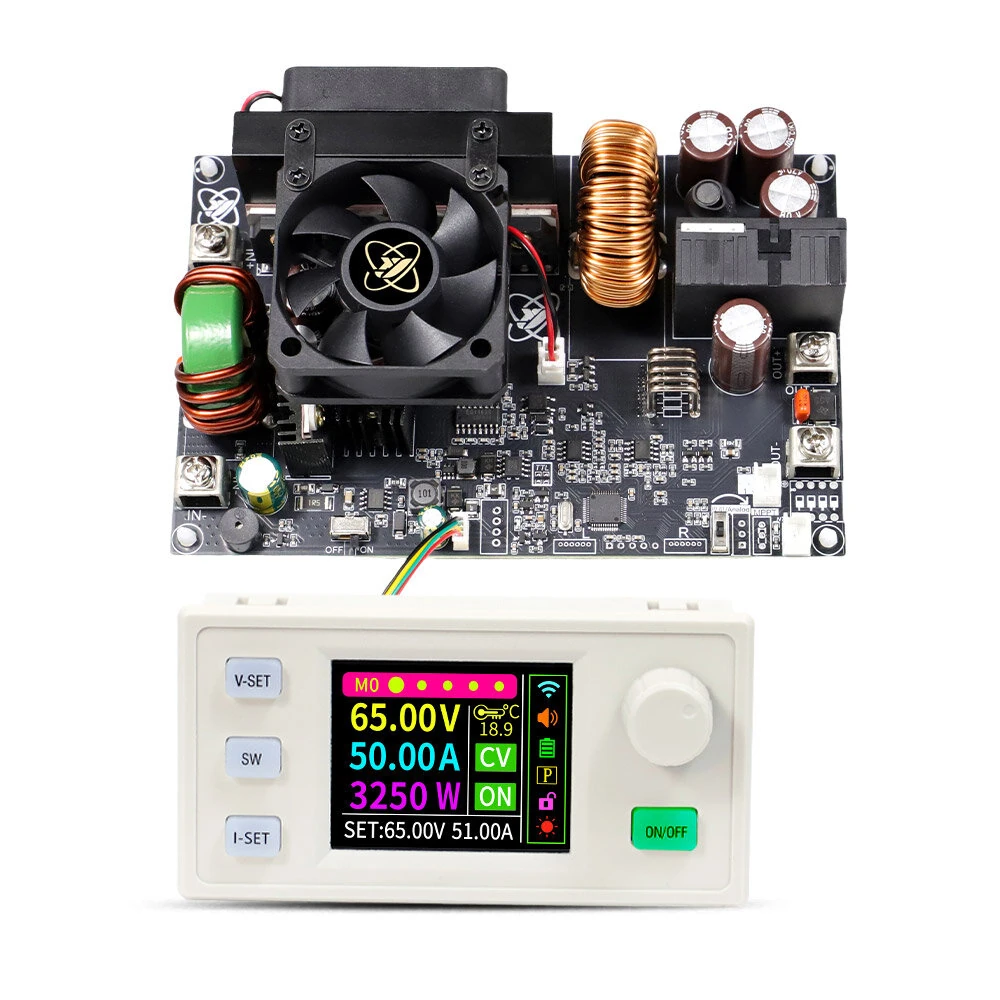
Sinilink XY6550S CNC DC Power Supply Module 65V/50A/3250W Adjustable High Precision MPPT Solar Charging LCD Display — image 1
Hover to zoom

Sinilink XY6550S CNC DC Power Supply Module 65V/50A/3250W Adjustable High Precision MPPT Solar Charging LCD Display

25+ bought in last month
AI Summary
product for everyday users

The Sinilink XY6550S CNC DC Power Supply Module 65V/50A/3250W Adjustable High Precision MPPT Solar Charging LCD Display is a premium product designed for everyday users.

₹5,834-31%
MRP:₹8,459Save ₹2,625
Free Shipping💵 COD Available

Available Offers

Free Delivery on this order. No minimum order value.

15-Day Easy Returns — hassle-free return & full refund.

Secure Payment — 100% safe checkout with UPI, Cards & Net Banking.

31% Off — you save ₹2,625 on this product!

Total: ₹5,834
Buying tip: A quality investment for dependable performance and premium build quality.
Estimated delivery: 27 Aug10 Sept
Free Shipping
Pan India delivery
15-Day Returns
Hassle-free policy
Secure Payment
Razorpay protected
Quality Assured
Vetted products only

Available Offers

💳

5% Cashback

Pay with UPI & get 5% cashback (up to ₹50) via Razorpay

🏦

No-Cost EMI

Available on select bank cards at checkout. 0% interest for 3 months.

📦

Free Shipping

Free delivery on all orders. No minimum order value.

💵

Cash on Delivery

COD available on orders up to ₹5,000 across India.

Ideal For

Everyday convenience
Share:
SKU: bg-2047315

About This Product

The Sinilink XY6550S CNC DC Power Supply Module 65V/50A/3250W Adjustable High Precision MPPT Solar Charging LCD Display is a premium designed for everyday users. It delivers reliable performance at an accessible price.

Why Buy from Pricio?

Pricio sources this product directly, cutting out multiple middlemen. Every order includes free shipping, a 15-day return policy, and secure payment via Razorpay.

Specifications:

Product Name: DC Buck-Power Supply
Model: XY6550S
Input Voltage Range: 12.00V - 75.00V
Output Voltage Range: 0.00V - 65.00V
Output Current Range: 0.00A - 50.00A
Power Output: 3250W
Accuracy of Voltage: ±0.5% +1 word
Accuracy of Current: ±0.5% +3 word
Resolution of Voltage: 0.01V
Resolution of Current: 0.01A
Storage Data Groups: 10 Groups
Screen: 1.8-Inch Full-View High-Brightness True Color LCD
Output Ripple Typical Value: VPP-200mv
MPPT Function: Supports MPPT Solar Charging
Efficiency of Conversion: Approximately 95%
Bare Board Dimensions: 86mm x 45mm x 28mm / 150.8mm x 99.4mm x 57mm
Protection Mechanisms: Anti-Reverse, Reverse Current Protection, Over-Voltage, Over-Current, Over-Power, Over-Temperature, Over-Time Out, Over-Capacity, Over-Energy

Protection mechanism: Input under-voltage(LVP): 10-75.00V, default 10V over-voltage(OVP): 0-67.00V, default 67.00V over-current(OCP): 0-52A, default 52A over-power(OPP): 0-3400W, default 3300W over-temp(OTP): 60-110 ℃, default 110 ℃ over-time out(OHP): 1 minute - 99hours 59 minutes, off by default over-capacity(OAH): 0-4200KAh, off by default over-energy(OWH): 0-4200KWh, off by default EXT over-temp(ETP): 0-110 ℃, off by default

Features:
1. High precision with ±0.5% voltage and ±0.5% current accuracy for reliable and stable output control.
2. Compact design with 3250W power output, meeting various laboratory or industrial use cases.
3. Advanced MPPT solar charging support ensures efficient energy optimization and usage.
4. 1.8-inch True Color LCD display provides clear data visualization and user-friendly operations.
5. Multiple safety mechanisms including over-voltage, over-current, and reverse current protection.

Package Included:
1 x DC Buck-Power Supply Module


Product Safety Information

Setup Guide

1
Identify the pins
Locate VCC (power), GND (ground), and data pins (SDA/SCL for I2C, MOSI/MISO for SPI, or TX/RX for UART). Refer to the pinout diagram on the product page.
2
Wire to your microcontroller
Connect VCC to 3.3V or 5V (check the module spec), GND to GND, and data pins to the appropriate GPIO pins on your Arduino or Raspberry Pi.
3
Install libraries
In Arduino IDE, go to Sketch → Include Library → Manage Libraries and search for the sensor library. Install the recommended version.
4
Upload example sketch
Open File → Examples → [library name] → Basic Example. Upload to your board and open Serial Monitor to view output.
5
Calibrate if needed
Some sensors (temperature, humidity, distance) may need a short warm-up period or calibration. Run the calibration sketch if provided.