
1 / 5 · Click to enlarge
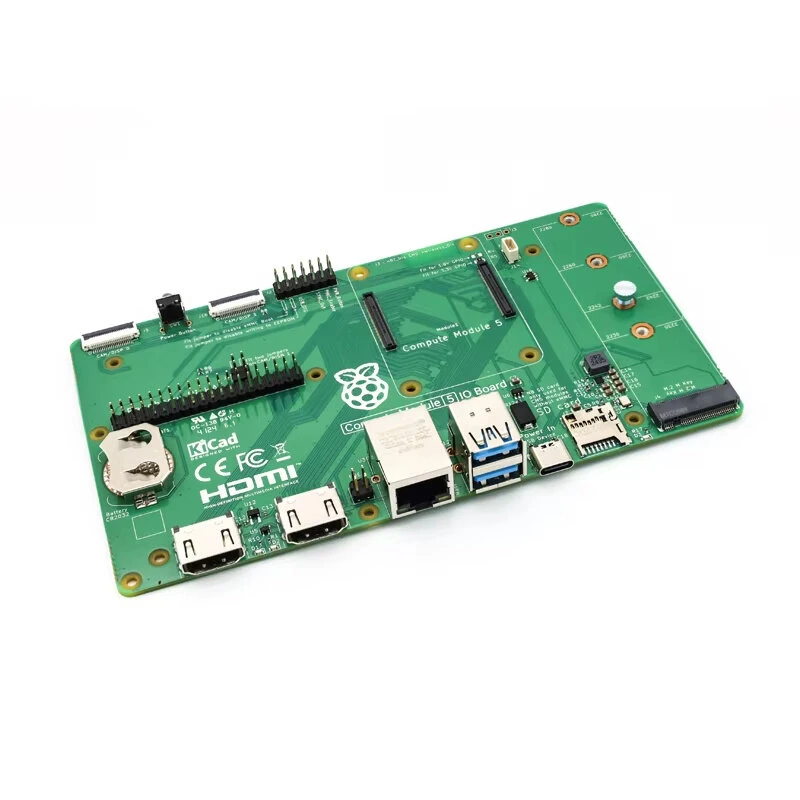
Raspberry Pi Compute Module 5 IO Expansion Board CM5IO M.2M Key PCIe Socket with Rich Interfaces
The Raspberry Pi Compute Module 5 IO Expansion Board CM5IO M.2M Key PCIe Socket with Rich Interfaces is a mid-range product designed for everyday users.
Available Offers
Free Delivery on this order. No minimum order value.
15-Day Easy Returns — hassle-free return & full refund.
Secure Payment — 100% safe checkout with UPI, Cards & Net Banking.
Color: Green
Available Offers
5% Cashback
Pay with UPI & get 5% cashback (up to ₹50) via Razorpay
No-Cost EMI
Available on select bank cards at checkout. 0% interest for 3 months.
Free Shipping
Free delivery on all orders. No minimum order value.
Cash on Delivery
COD available on orders up to ₹5,000 across India.
Ideal For
About This Product
The Raspberry Pi Compute Module 5 IO Expansion Board CM5IO M.2M Key PCIe Socket with Rich Interfaces is a mid-range designed for everyday users. It delivers reliable performance at an accessible price.
Why Buy from Pricio?
Pricio sources this product directly, cutting out multiple middlemen. Every order includes free shipping, a 15-day return policy, and secure payment via Razorpay.
- Form Factor: 160mm × 90mm
- Connectivity:
Standard 40-pin GPIO header
Gigabit Ethernet RJ45 with PoE+ HAT+ support
2 × USB 3 sockets
microSD card socket for Compute Module 5 Lite modules
M.2 M key PCIe socket
4-pin fan connector
2 × MIPI DSI/CSI-2 FPC connectors (22-pin 0.5 mm pitch cable)
Raspberry Pi HAT+ connector
RTC battery socket
- Video:
2 × full-size High Definition Multimedia Interface 2.0 connectors
- Input Power:
External +5V USB-C PSU
Power button to wake and shut down Compute Module 5
Features:
1. Comprehensive Connectivity:
Equipped with a variety of connection options including two USB 3 sockets and a Gigabit Ethernet RJ45 port with PoE+ support, ensuring robust and high-speed data transfer capabilities.
2. Extendable Storage Options:
It features a microSD card socket for Compute Module 5 Lite modules and an M.2 M key PCIe socket, providing flexible and expandable storage solution for diverse application needs.
3. Enhanced Video Outputs:
With two full-size High Definition Multimedia Interface 2.0 connectors, users can exploit high-definition video output capabilities, making it suitable for multimedia and graphic-intensive projects.
4. Cooling and Power Management:
The board includes a 4-pin fan connector and an external +5V USB-C PSU with a power button, allowing reliable cooling and easy power management for seamless operation.
5. Versatile Design Interface:
It supports standard 40-pin GPIO headers and MIPI DSI/CSI-2 connectors, enhancing design versatility and enabling integration with various peripheral devices for customized projects.
Package Included:
1 x Raspberry Pi Compute Module 5 IO Board
1 x External Antenna
1 x Protective Case
1 x USB-C Power Supply
1 x User Manual


