
1 / 6 · Click to enlarge
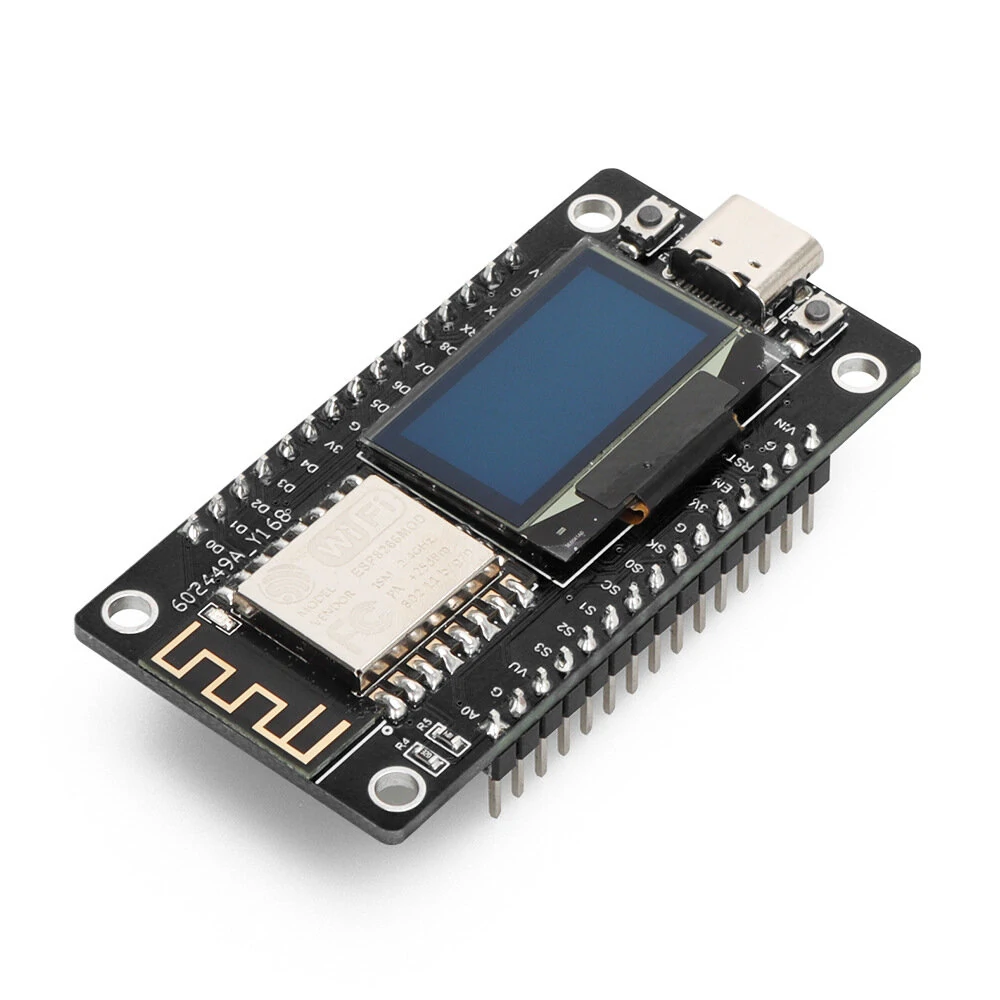
NodeMCU ESP8266 Development Board with 0.96inch OLED Display CH340 ESP-12F WiFi Module Micro USB for Micropython ESP8266
5.05 ratingsThe NodeMCU ESP8266 Development Board with 0.96inch OLED Display CH340 ESP-12F WiFi Module Micro USB for Micropython ESP8266 is a value-for-money product designed for everyday users. 100% of buyers rate it 4★ or above.
Available Offers
Free Delivery on this order. No minimum order value.
15-Day Easy Returns — hassle-free return & full refund.
Secure Payment — 100% safe checkout with UPI, Cards & Net Banking.
Available Offers
5% Cashback
Pay with UPI & get 5% cashback (up to ₹50) via Razorpay
No-Cost EMI
Available on select bank cards at checkout. 0% interest for 3 months.
Free Shipping
Free delivery on all orders. No minimum order value.
Cash on Delivery
COD available on orders up to ₹5,000 across India.
Ideal For
About This Product
The NodeMCU ESP8266 Development Board with 0.96inch OLED Display CH340 ESP-12F WiFi Module Micro USB for Micropython ESP8266 is a value-for-money designed for everyday users. It delivers reliable performance at an accessible price.
Customer Verdict
100% of buyers rated this product 4 stars or above.
Why Buy from Pricio?
Pricio sources this product directly, cutting out multiple middlemen. Every order includes free shipping, a 15-day return policy, and secure payment via Razorpay.
Specification:
Product Name: NodeMCU ESP8266 Development Board with 0.96'' OLED Display
Model Number: ESP8266-OLED-CH340
Microcontroller: Tensilica 32-bit RISC CPU Xtensa LX106
Driver: CH340G
Operating Voltage: 3.3V
Input Voltage: 7-12V
Digital I/O Pins (DIO): 16
Analog Input Pins (ADC): 1
UARTs: 1
SPIs: 1
I2Cs (12Cs): 1
Flash Memory: 4 MB
SRAM: 64 KB
Clock Speed: 80 MHz
OLED Display: 0.96-inch with SSD-1306 driver, 128x64 resolution
USB-TTL: CH340 based onboard for plug and play
Features:
1. Integrated Development and Display: The NodeMCU ESP8266 board integrates seamlessly with a 0.96-inch OLED display (128x64 resolution) using I2C interface. No messy wiring or breadboarding required. Easily display various information and data with high-definition clarity.
2. Versatile Microcontroller: Powered by the Tensilica Xtensa LX106 RISC microprocessor, this board supports multiple programming modes, including Arduinno IDE, MicroPython, and Lua scripts. It operates at a clock frequency between 80 MHz and 160 MHz, featuring 128 KB of RAM and 4 MB of Flash memory.
3. Easy Driver Installation: The board features the CH340G driver, ensuring smooth and hassle-free connectivity. Drivers can be easily installed by searching for "CH340 Driver" online, with specific guidance recommended for the Windows 10 operating system.
4. IoT Project Ready: With its built-in Wi-Fi capability and a complete network protocol stack, this board is an ideal choice for various IoT projects. Suitable for beginners and professionals alike, it's suitable for projects like network status display, weather stations, news stations, clocks, and more.
5. Plug and Play Design: The board includes USB-TTL based on the CH340G chip, allowing for easy plug and play connectivity. With soldered pins, it's ready for immediate use, making development and application of IoT projects convenient.
Package Include:
1x NodeMCU ESP8266 Development Board


