1 / 4 · Click to enlarge
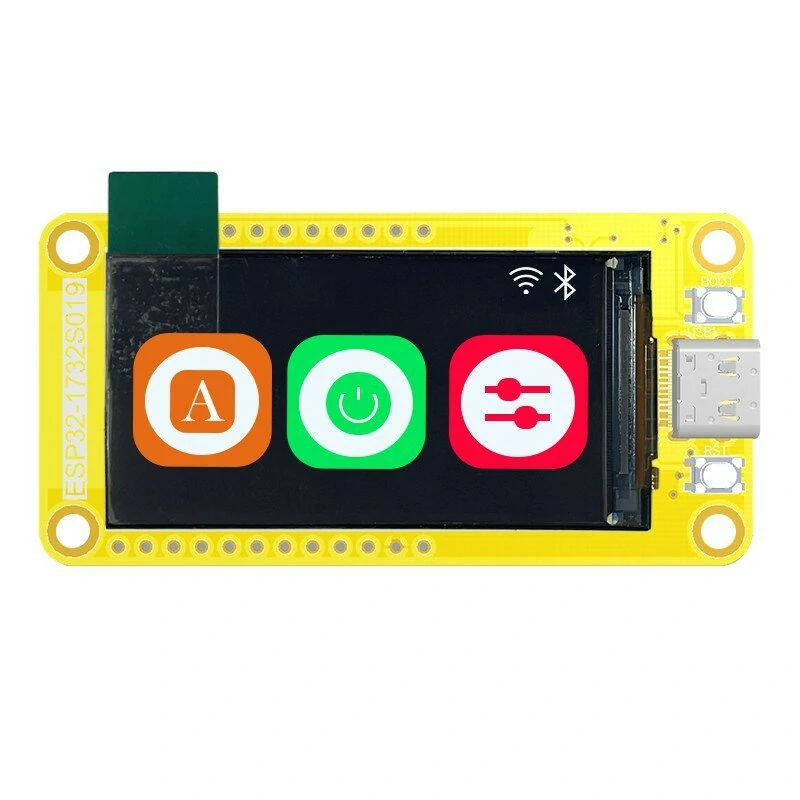
ESP32-S3 with 1.9 inch Screen LVGL Development Board WiFi&bluetooth 170*320 Display TFT Module
5.03 ratingsThe ESP32-S3 with 1.9 inch Screen LVGL Development Board WiFi&bluetooth 170*320 Display TFT Module is a mid-range motherboard & development board designed for everyday users.
Available Offers
Free Delivery on this order. No minimum order value.
15-Day Easy Returns — hassle-free return & full refund.
Secure Payment — 100% safe checkout with UPI, Cards & Net Banking.
Available Offers
5% Cashback
Pay with UPI & get 5% cashback (up to ₹50) via Razorpay
No-Cost EMI
Available on select bank cards at checkout. 0% interest for 3 months.
Free Shipping
Free delivery on all orders. No minimum order value.
Cash on Delivery
COD available on orders up to ₹5,000 across India.
Ideal For
About This Product
The ESP32-S3 with 1.9 inch Screen LVGL Development Board WiFi&bluetooth 170*320 Display TFT Module is a mid-range motherboard & development board designed for everyday users. It delivers reliable performance at an accessible price.
Why Buy from Pricio?
Pricio sources this product directly, cutting out multiple middlemen. Every order includes free shipping, a 15-day return policy, and secure payment via Razorpay.
Working voltage: 4.75-5.25V
SPIFlash: default 32Mbit
RAM internal: 520KB
Wi-Fi: 802.11b/g/n/e/i
Bluetooth: Bluetooth 4.2BR/EDR and BLE standard
Support interface: (2Mbps) UART, SPI, I2C, PWM
Support TF card, maximum support 4G
IO port: 9
Serial port rate: default 115200bps
Spectrum range: 2400 ~2483.5MHz
Antenna form: Onboard PCB antenna, gain 2dBi
Image output format: JPEG (only OV2640 support), BMP, GRAYSCALE
Packaging method: DIP-16
Transmit power 802.11b: 17±2dBm (@11Mbps)
802.11g: 14±2dBm (@54Mbps)
802.11n: 13±2dBm (@MCS7)
Receiving sensitivity CCK, 1Mbps: -90dBm
CCK, 11Mbps: -85dBm
6Mbps(1/2BPSK): -88dBm
54Mbps (3/464-QAM): -70dBm
MCS7 (65Mbps, 72.2Mbps): -67dBm
Power consumption Turn off the flash: 180mA@5V
Turn on the flash and adjust the brightness to the maximum: 310mA@5V
Deep-sleep: The lowest power consumption can reach 6mA@5V
Moderm-sleep: the lowest can reach 20mA@5V
Light-sleep: the lowest can reach 6.7mA@5V
Security: WPA/WPA2/WPA2-Enterprise/WPS
Working temperature: -20 ℃~ 70 ℃
Storage environment: -40 ℃~ 125 ℃, <90%RH
Features:
1. Use low-power dual-core 32-bit CPU, which can be used as an application processor.
2. The main frequency is up to 240MHz, and the computing power is up to 600 DMIPS.
3. Built-in 520 KB SRAM.
4. Support UART/SPI/I2C/PWM/ADC/DAC and other interfaces.
5. Support OV2640 and OV7670 cameras, built-in flash.
6. Support picture WiFI upload.
7. Support TF card.
8. Support multiple sleep modes.
9. Embedded Lwip and FreeRTOS.
10. Support STA/AP/STA+AP working mode.
11. Support Smart Config/AirKiss one-click network configuration.
12. Support secondary development.
Application:
Home smart device image transmission
Wireless monitoring
Smart agriculture
QR wireless recognition
Wireless positioning system signal
And other IoT applications
Package Include:
1× Development Board