
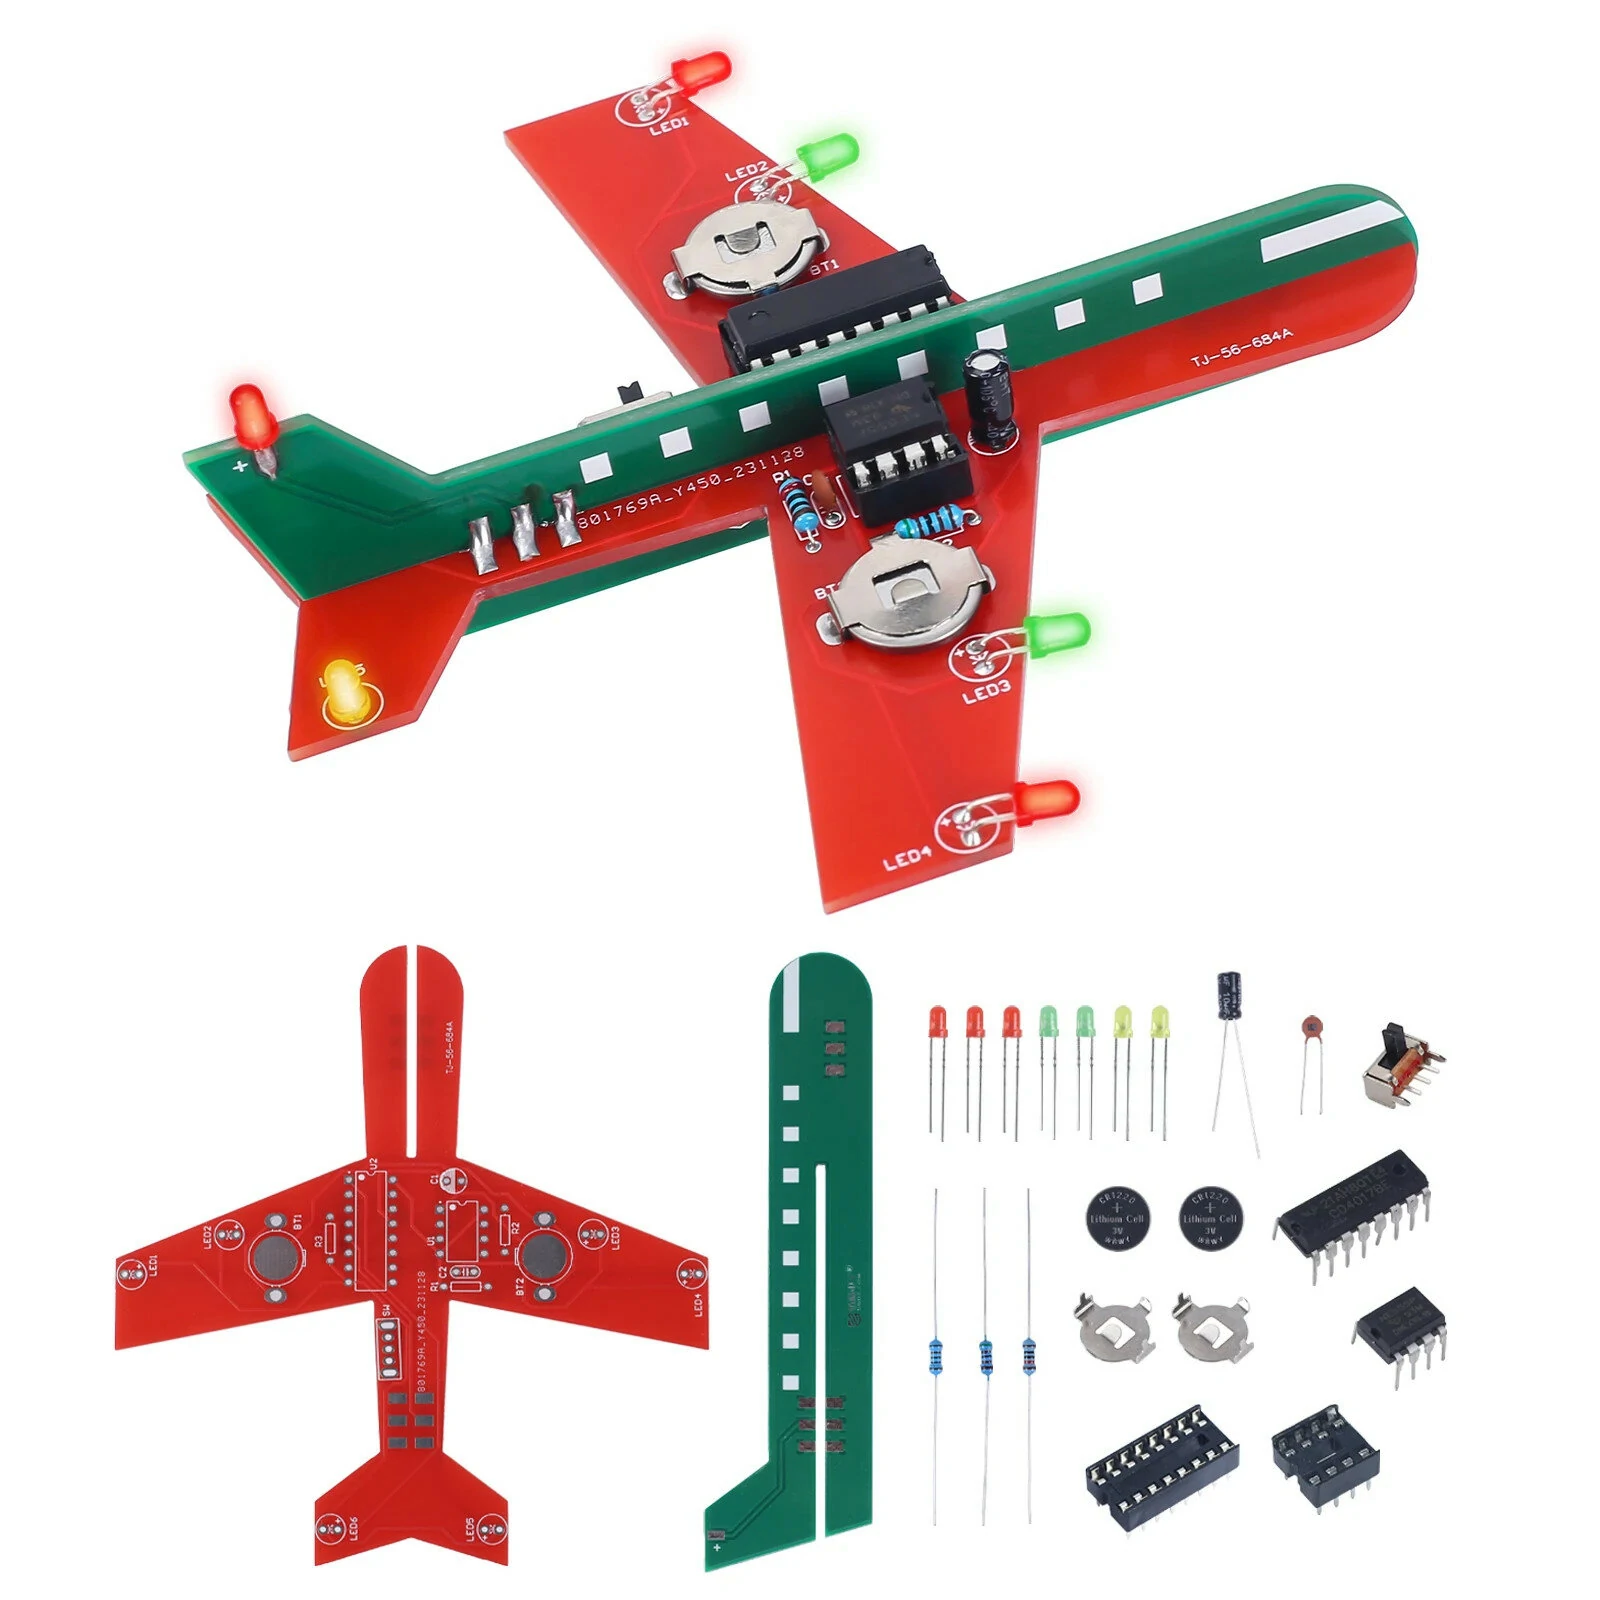
DIY Electronic Kit Airplane Flashing LED Simulate Aircraft Soldering Project Practice For STEM Student Learning
5.01 ratingThe DIY Electronic Kit Airplane Flashing LED Simulate Aircraft Soldering Project Practice For STEM Student Learning is a value-for-money product designed for students.
Available Offers
Free Delivery on this order. No minimum order value.
15-Day Easy Returns — hassle-free return & full refund.
Secure Payment — 100% safe checkout with UPI, Cards & Net Banking.
Available Offers
5% Cashback
Pay with UPI & get 5% cashback (up to ₹50) via Razorpay
No-Cost EMI
Available on select bank cards at checkout. 0% interest for 3 months.
Free Shipping
Free delivery on all orders. No minimum order value.
Cash on Delivery
COD available on orders up to ₹5,000 across India.
Ideal For
About This Product
The DIY Electronic Kit Airplane Flashing LED Simulate Aircraft Soldering Project Practice For STEM Student Learning is a value-for-money designed for students. It delivers reliable performance at an accessible price.
Why Buy from Pricio?
Pricio sources this product directly, cutting out multiple middlemen. Every order includes free shipping, a 15-day return policy, and secure payment via Razorpay.
Introduction: It is an Airplane Flashing LED Circuit DIY Kit.It can simulate the flickering effect of airplane lights and DIY create a desktop decoration. It can not only be used as a DIY electronic welding kit that allows you to better understand the circuit and learn how to soldering, but also as a very suitable experimental workbench tool. Feature: 1. Simulate aircraft design 2. Built-in CR1220 lithium battery 3. Interesting DIY Manual Soldering 4. Simple and easy to operate Parameter: 1. LED color: Red/Green/Yellow 2. Battery type: CR1220 3. Work Temperature: -20℃~85℃ 4. Work Humidity: 0%~95%RH 5. Size(Installed): 110*105*33mm
Application: 1. Training welding skills 2. Student school 3. DIY production 4. Project Design 5. Electronic competition 6. Gift giving 7. Crafts collection 8. Home decoration
9. Graduation design 10. Holiday gifts Installation Tips: 1. User needs to prepare the solderingtool at first. 2. Please be patient until the installation is complete. 3. The package is DIY kit. It need finish install by user. 4. The soldering iron can't touch the components for a long time(1.0 second), otherwise it will damage the components. 5. Pay attention to the positive and negative of the components. 6. Strictly prohibit short circuit. 7. Install complex components preferentially. 8. Make sure all components are in right direction and right place. 9. Please wear anti-static gloves or anti-static wristbands when installing electronic components. 10. It is strongly recommended to read the installation manual before starting installation!!!
Component listing: 1 x DIP-16 CD4017BE decimal counter at U2.
1 x DIP-8 NE555P timer at U1.
1 x DIP-16 IC Socket at U2.
1 x DIP-8 IC Socket at U1.
1 x 1Kohm Metal Film Resistor at R3.
1 x 5.1Kohm Metal Film Resistor at R2.
1 x 10Kohm Metal Film Resistor at R1.
3 x 3mm Red LED at LED1,LED4,LED7.
2 x 3mm Green LED at LED2,LED3. 2 x 3mm Yellow LED at LED5,LED6.
1 x 0.01uF 103 Ceramic Capacitor at C2.
1 x 10uF Electrolytic Capacitor at C1.
1 x Power Switch at SW.
1 x CR1220 lithium battery at BT1,BT2.
1 x CR1220 lithium battery socket at BT1,BT2.
2 x PCB circuit board


