
1 / 10 · Click to enlarge
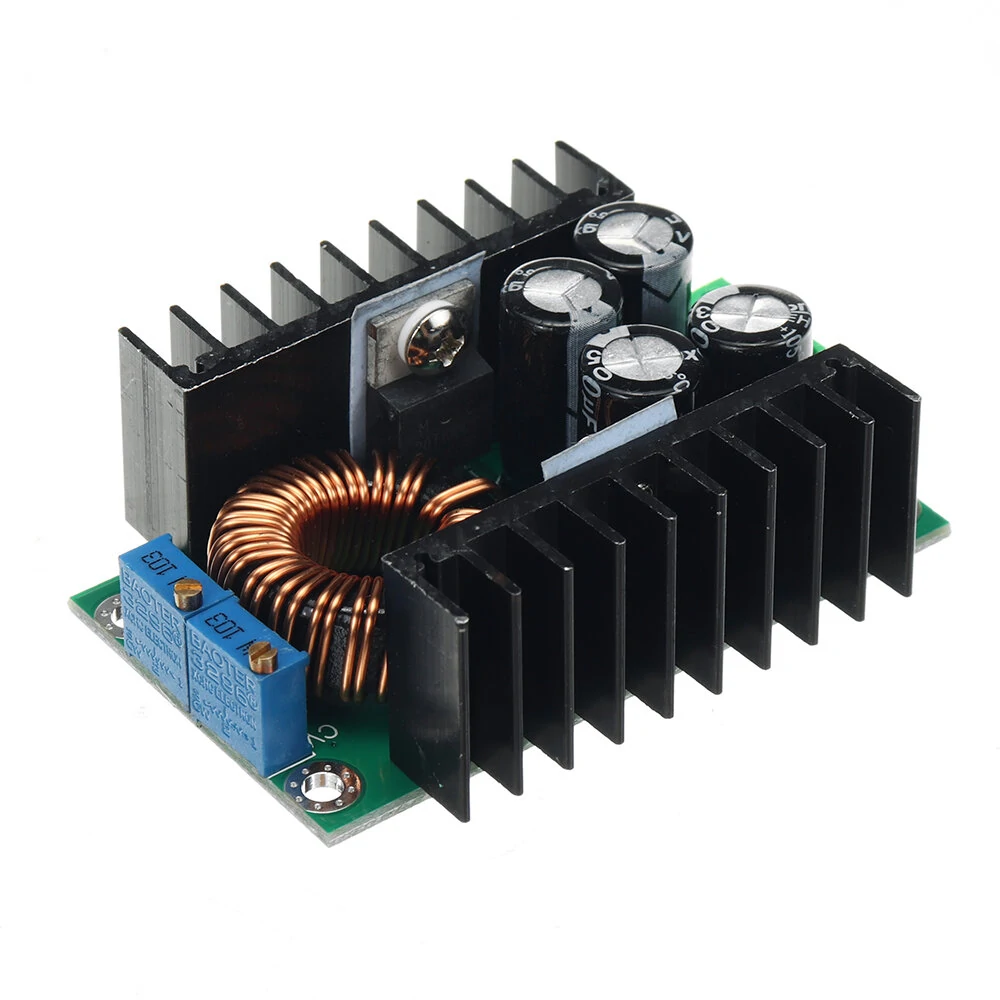
DC-DC9A 300W Buck Module DC 5-40V to 1.2-35V XL4016 Converter Module with Constant Current
5.04 ratingsThe DC-DC9A 300W Buck Module DC 5-40V to 1.2-35V XL4016 Converter Module with Constant Current is a value-for-money product designed for everyday users.
Available Offers
Free Delivery on this order. No minimum order value.
15-Day Easy Returns — hassle-free return & full refund.
Secure Payment — 100% safe checkout with UPI, Cards & Net Banking.
Available Offers
5% Cashback
Pay with UPI & get 5% cashback (up to ₹50) via Razorpay
No-Cost EMI
Available on select bank cards at checkout. 0% interest for 3 months.
Free Shipping
Free delivery on all orders. No minimum order value.
Cash on Delivery
COD available on orders up to ₹5,000 across India.
Ideal For
About This Product
The DC-DC9A 300W Buck Module DC 5-40V to 1.2-35V XL4016 Converter Module with Constant Current is a value-for-money designed for everyday users. It delivers reliable performance at an accessible price.
Why Buy from Pricio?
Pricio sources this product directly, cutting out multiple middlemen. Every order includes free shipping, a 15-day return policy, and secure payment via Razorpay.
1. Module properties: Non-isolated step-down constant current, constant voltage module (CC CV) charging module
2. Input voltage: DC 7-32V
3. Output voltage: (1) DC 0.8-28V continuously adjustable. (2) Fixed output:Choose between 0.8v-28v
4. Output Current: 8A (when power tube's temperature exceeds 65 degrees, please add cooling fan)
5. Constant current range: 0.2-8A ( adjustable )
6. Turn lamp current: Constant current value * ( 0.1 ) , turn the lamp current and constant value linkage,
such as constant current value is 3A, turn the lamp current is set to a constant current is 0.1 times (0.1 * 3A = 0.3A).
7. Lowest pressure: 1V
8. Output Power: Maximum power is about 300W
9. Conversion efficiency: Up to about 95%
10. Operating frequency: 300KHZ
11. Output ripple: 20M bandwidth
12. Input 24V output 12V 5A ripple around 50mV (Excluding noise)
13. Output short circuit protection : Yes, constant current
14. Input reverse polarity protection: None
15. Output prevent backflow: None
16. Wiring: Terminal
17. No-load current: Typical 20mA (24V switch 12V)
18. Load regulation: ± 1% ( constant )
19. Voltage regulation: ± 1%
20. Dynamic response speed: 5% 200uS
21. Potentiometer adjustment direction: clockwise (increase) , counterclockwise (decrease),
the potentiometer(CV) closed to the input voltage is used to regulate voltage, the potentiometer(CC)
closed to output voltage is used to regulate current (CC)
22. Operating temperature: Industrial grade (-40 °C to +85 °C) ( please note the actual use
of the power tube temperature , high temperature heat strengthened)
23. Indicator: dual color indicator, charging indicator light is red, the green light means
fully charged ( No load is green )
24. Size(approx): 65 x 47 x 22mm (L x W x H)
25.Precision of constant current and temperature: On the actual test, the module temperature from 25 degrees
to 60 degrees, the constant current value change is less than 5% (5A constant current value)
26. Output short circuit protection: Yes,Constant current (the current setting constant current value)
27. Input reverse connect protection: NO
28. Output prevent reverse flow: NO
29. Wiring Method: amphenol connector
Features:
1. Fixed turn lamp current is 0.1 times the current value
( Used to identify whether the battery is fully charged When charging).
2. Made from a dedicated benchmark IC and high-precision current sensing resistor, proving a more stable
constant current, (when 20°C to 100°C constant current 1A, temperature drift less than 1%).
Particularly suitable for LED driver.
3. High output current, the max output current can reach 8A.
4. Four high frequency capacitance, can lower output ripple, enhance the work stabilization.
5. Double heat sink design. MOS schottky diode independent heat sink,which heat dissipation is good,
and won't affect each other.
6. Using large size Sendust Core and double pure copper wiring, improve working efficiency, reduce fever.
7. 3296 multiturn potentiometer,high accuracy voltage and current regulation, good stability.
8. Double color lamp, working condition be clear at a glance
9. Voltage and current are adjustable,wich effect is good.
Applications:
1. High-power LED driver.
2. Lithium battery(or lead accumulator) charge.
3. Vehicle-mounted power supply.
4. Low voltage system power supply.
5. 6V, 12V, 14V, 24V battery charge.
6. On-board laptop power supply.
7. regulated power supply.
8.Low voltage power supply system.
Battery charge:
1. Make sure of the battery float voltage and charging current that you need, as well as the input voltage of the module.
2. Adjust the constant voltage potentiometer and adjust the output voltage to about 5V.
3.Use the multimeter in 10A current scale to measure output short-circuit current, and adjust the
current potentiometer to make the output current to the expected charging current value.
4. Adjust the constant voltage potentiometer to make the output voltage reaches the float voltage.
5. Connected to the battery, try to charge.
(1,2,3,4 steps to connect the power module input,output no-load does not connect battery.)
LED constant current drive:
1. Make sure the operating current and Max operating Voltage of the LED you need to drive.
2. Adjust the constant voltage potentiometer, adjust the output voltage to about 5V.
3. Use the multimeter in 10A current scale to measure output short-circuit current, and adjust the current
potentiometer to make sure the output current to the expected LED operating current.
4. Adjust the constant voltage potentiometer to make the output voltage reach the maximum LED operating voltage.
5. Connect LED, test.
(1,2,3,4 steps to connect the power module input, output No-load does not connect LED.)
Package Include:
1× Buck Module


