
1 / 7 · Click to enlarge
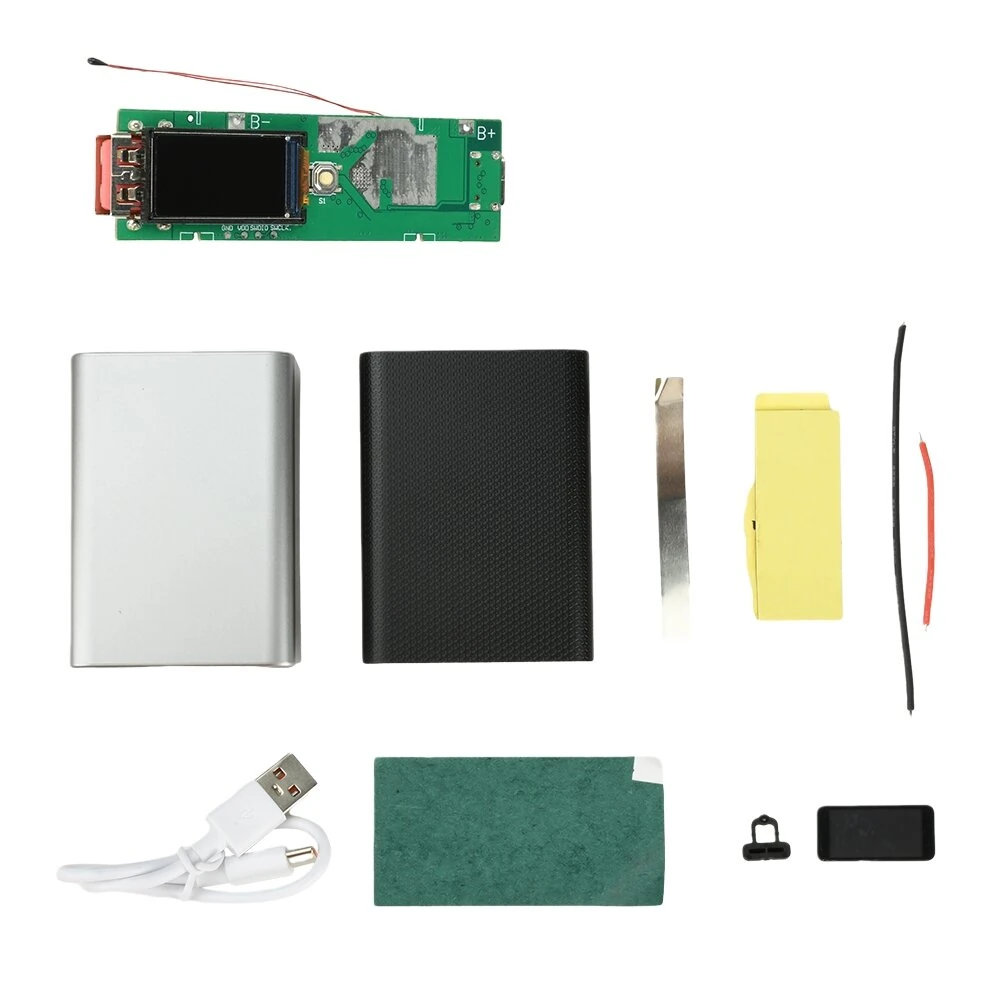
22.5W Portable Power Bank Module DIY Charging Kit TFT Color Screen Fast Charge Type-C PD Power Module for 21700 Battery
The 22.5W Portable Power Bank Module DIY Charging Kit TFT Color Screen Fast Charge Type-C PD Power Module for 21700 Battery is a mid-range product designed for DIY enthusiasts and makers.
Available Offers
Free Delivery on this order. No minimum order value.
15-Day Easy Returns — hassle-free return & full refund.
Secure Payment — 100% safe checkout with UPI, Cards & Net Banking.
13% Off — you save ₹366 on this product!
Type: DIY Kit
Available Offers
5% Cashback
Pay with UPI & get 5% cashback (up to ₹50) via Razorpay
No-Cost EMI
Available on select bank cards at checkout. 0% interest for 3 months.
Free Shipping
Free delivery on all orders. No minimum order value.
Cash on Delivery
COD available on orders up to ₹5,000 across India.
Ideal For
About This Product
The 22.5W Portable Power Bank Module DIY Charging Kit TFT Color Screen Fast Charge Type-C PD Power Module for 21700 Battery is a mid-range designed for DIY enthusiasts and makers. It delivers reliable performance at an accessible price.
Why Buy from Pricio?
Pricio sources this product directly, cutting out multiple middlemen. Every order includes free shipping, a 15-day return policy, and secure payment via Razorpay.
Specifications:
Product Name: Portable Power Bank Kit
Input Parameters: 5V3A / 9V2A / 12V1.5A
Output Parameters: 5V3A / 9V2.22A / 12V1.67A / 10V2.25A
Display: 0.96-inch TFT Color Screen
Dimensions: Motherboard: 76mm x 21mm x 8.4mm; Case: 80.8mm x 58mm x 25.4mm
Battery Compatibility: Supports two 21700 batteries (soldering required; batteries not included)
Interfaces: 1 Type-C fast charging port (supports both charging and output) + 1 USB fast charging output port
Features: Comprehensive motherboard protection including overcharge/over-discharge/overvoltage/overheat safeguards. High conversion efficiency with stable current and voltage output.
Note: 22.5W supports VOOC Flash Charge protocol. Bidirectional fast charging operates at PD 20W protocol. Simultaneous multi-port output does not support fast charging.
Features:
1. High Conversion Efficiency Circuit Design: Optimized for stable charging with minimal power loss.
2. 22.5W Super-Fast Charging: Compatible with PD, QC, and VOOC multi-protocol fast charging.
3. Built-in Multiple Protecting Functions: Prevents overcharging, over-discharging, overheating, and overvoltage.
4. Bidirectional Fast Charging Capability: Supports VOOC Flash Charge Protocol and PD 20W protocol.
5. Simultaneous Multi-Port Usage: Convenient charging but fast-charging works for single-port use only.
6. Compact Dimensions: Easy-to-assemble kit with compatibility for 21700 batteries.
Package Includes:
1 x DIY Kit


